Create PDF Page Turner Effect, Animation or Booklet & Flip Pages
PDFs are a great way to share documents with others, but sometimes you want an interactive experience.
One technique for creating this is the PDF with page turn effect or flipbook style of animation. Creating this type of animation requires some basic knowledge of some software. However, this post will focus on the easiest way to make a page-turn effect in PDF.
What Is the Best Option to Make a Flipbook from PDF?
The best option is to use Flipbuilder or other similar PDF page-turner software. We will cover how to create page-turn animations in PDF files using one or two programs.
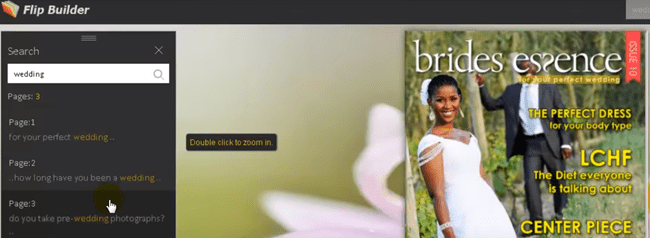
Let's start by looking at the two types of animations that can be created in PDF files.
Multi-Page Animation (The Big Picture)
A multi-page PDF document (creatively named “Big Picture”) will contain all pages of your flipbook merged into one file, allowing you to create fullscreen page-turning animations. This type of animation is best used for presentations, digital magazines, or other content that will be consumed on a larger screen.
Single-Page Animation (Detail View)
A single-page PDF document (named “Detail View”) will contain one page of your flipbook at a time, allowing you to create more intricate animations with fewer overall files. This type of animation is best used for short documents or pamphlets that contain a unique detailed, yet smaller story.
Option 1: Combine all pages into one file for single-page animations
For this method, we can use Flipbuilder to combine the PDFs and create the Animation project files which you can upload and share on social media and other platforms. This PDF page turn software can combine the pages into one single file and then create an Animation project from it.
Option 2: Combine all pages into multi-page animations
You'll need to use Flipbuilder for this method. You can either purchase a license of Flipbuilder or you can download it to try it.

When using the free trial, please note that there may be a watermark on each page of your flipbook after exporting even for single-page animations. To get rid of the watermarks, you'll need to purchase a license from Flipbuilder.
Also note that when exporting a multi-page PDF from Flipbuilder, the software will automatically create an Animation project for you.
1. Import your PDF files into Flipbuilder
2. Click on the “Pages” tab and select all pages of your document
3. Under the “Page Turning” tab, choose “Multi-Page Animation” as the export type
4. Name your file and save it
5. You can now upload the file to wherever you want or you can embed it on your website.
The instructions here will show you how to combine pages into one multi-page PDF using Flipbuilder:
What Is a Page Turn Effect or Flipbooks in PDF and How to Create One?
A page-turn effect or flipbook is a technique widely used in PDFs to create an illusion of animation. It is the process of turning pages in a document so that it looks like a real book.
In addition to the program mentioned above, this effect can also be created in programs such as Adobe Acrobat, InDesign, and Illustrator.
In this tutorial, you will learn how to create a page-turn effect or flipbook in PDF from scratch. You will also learn how to add sound effects to your flipbook for added enhancement.
What You'll Need:
To follow this tutorial, you will need the following software and tools:
-Adobe Acrobat or InDesign
-PDF page turn software (Flipbuilder or others)
-Sound recorder and editor (Audacity, Adobe Audition, etc.)
How to Create a Page Turn Effect or Flipbook in Adobe Acrobat
Adobe Acrobat allows you to perform multi-stage “actions” that can then be exported as a PDF. For example, an action could be opening the first page of a PDF and then, 5 seconds later, opening the second page once you click on some sort of button. You can then export the result as a single PDF.

The first thing you'll need to do is open Adobe Acrobat and import your document. After that, click on “File”, “Automate”, and then “Create Multiple Copies in One Document.” You will now be able to choose the number of copies that you want for each page.
How to Insert Text, Images, Videos, or Sound Files into the Flip Book
Adding multimedia content to your flipbook is a great way to engage readers and add visual interest. We'll show you how to add text, images, videos, or sound files to your flipbook. We'll also provide some tips on how to make the most of your multimedia content.
Text:
Adding text to your flipbook is a great way to engage readers and add extra information. To add text, first select the “Text” tool from the toolbar. Then, click on the page where you want to insert the text. A text box will appear. type in your text and then click on the “Close” button.
Images:
Adding images to your flipbook is a great way to add visual interest. To add an image, first select the “Image” tool from the toolbar. Then, click on the page where you want to insert the image.
A new window will appear. Navigate to the location of the image on your computer and select it. After that, you can resize the image by dragging the corners. You can also change the orientation of the image by selecting “Rotate.” When you're done, click on the “Close” button.
Videos:
Adding videos to your flipbook is a great way to engage readers and add extra information. To add a video to your flipbook, first, find the YouTube or Vimeo URL of the video and copy it.
Next, in Adobe Acrobat, click on “Insert,” “Multimedia,” and then “YouTube Video.” A window will appear where you can paste the URL. Click on “OK” when you're done
Sound:
Adding sound to your flipbook can add a more dynamic effect to your publication. To do so, first, click on the “Sound” tool from the toolbar.
Then, click on the page where you want to insert sound. A new window will appear where you can record or select an audio file on your computer. When you're done, click on “OK.”
How to Add a Button to Your Flip Book
Buttons are a great way to allow readers to interact with your flipbook.
To add a button, first select the “Button” tool from the toolbar. Then, click on the page where you want to insert the button. A new window will appear. Drag and resize the button to fit on the page. Then, enter a name for the button in the “Label” text box. In the “Action” text box, enter the action that you want to occur when the reader clicks on the button.
You can choose from a variety of actions, such as opening a new PDF, going to a specific page, or playing a sound. When you're done, click on the “Close” button.
How to Export Your Flip Book as a PDF
Once you've finished creating your flipbook, you'll want to export it as a PDF. To do so, first, select the “File” menu and then “Export.”
A window will appear where you can choose the “PDF” option from the drop-down menu. Then, choose a location where you want to save the PDF and select “Export.” A new window will appear with additional options for your flipbook. When you're done, click on the “Export” button.
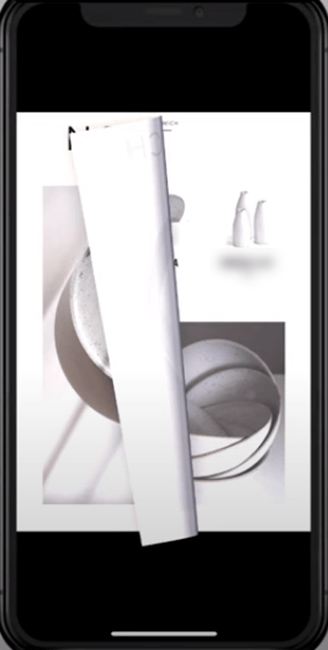
How to Export the Final Product as an Interactive PDF File
You are about to learn how to export your product as a PDF file so you can share it with others. This is the final step in the design process because this will allow you to produce a high-quality product that can be shared with anyone on any device.
If you will not be making use of the Flipbuilder software, you may follow the steps below to produce an interactive PDF.
First, open your completed product in Adobe Illustrator.
This is the final product you will be exporting as an interactive PDF file.
Maximize the application window because you'll need plenty of workspaces to complete all the steps. Now turn on the Layers panel by clicking Window > Pathfinder Properties > Layers or just click on the Layers icon at the bottom of the application window.
The Layers panel is used to turn on/off each group, content, and link.
Next, click on the Window menu and select Links or just click on the Links icon at the bottom of the application window. This will open up Adobe Acrobat for you to set up your interactive document.
If it's your first time exporting an interactive PDF, you'll see a window.
Click on OK to continue.
Now you'll see the Links panel. This is where you will create your hyperlinks and define how the document will behave when users open it.
For example, if you want a particular page to be displayed when the user opens the product, you will create a hyperlink to that page. Then if the user clicks on any other page, they will flip through all of your pages like in an actual magazine or brochure.
You can set up your document so users can view single pages or multiple pages at once by making each page into a link.
Tips on Creating Pages for Your ebook with Templates
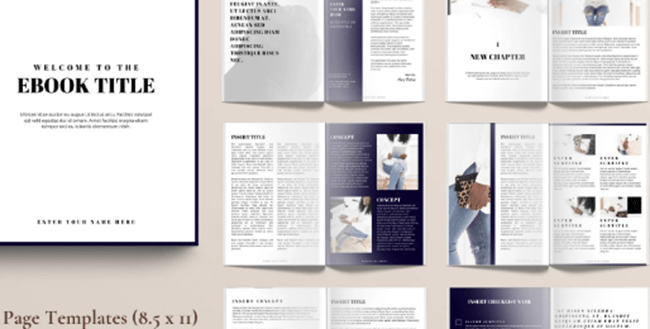
It's easy to create pages for your ebook using templates. Just follow these simple tips:
1) Choose the right template. There are many different templates to choose from, so find one that fits the style of your book.
2) Customize the template to fit your needs. You may need to add or delete text boxes, change the font or color, or adjust the layout.
3) Be consistent with your formatting. Use the same font, size, and color throughout your ebook. This will help it look polished and professional.
4) Proofread your work. Once you're done creating pages for your ebook, proofread them carefully to make sure there are no errors. Then publish!
Creating Animation Effects Like Turning PDF Pages Automatically
There is a way to create animation effects by turning pages automatically in Adobe Acrobat. This is done by adding a watermark that has transparent areas and then setting the transparency of the watermark. You can also use this technique to animate other objects on a page.
In this tutorial, you will learn how to turn pages automatically in an Acrobat document.

Step 1: Draw a Rectangle
The first thing you need to do is select the Rectangle tool and draw a rectangle on your page. This will be used as your watermark view object.
Select the Rectangle tool
Drag out a rectangle on your page
You can use any size or color for this object, but for the purposes of this tutorial, I'm using a green-filled rectangle.
Step 2: Reduce the Opacity of the Rectangle to 50%
Next, we want to reduce the opacity (or transparency) of your rectangle so parts of it will be transparent and only the text in the rectangle will show up over your document. To do this, select the rectangle and then go to Window > Transparency or just press Ctrl+Shift+T (Command+Shift+T on a Mac).
Select the rectangle
Reduce the opacity to 50%
You will now see that some of the rectangles are transparent.
Step 3: Create a Watermark
Now we want to create our watermark that will be used to turn the pages automatically. Go to File > Create Watermark and select Transparent Text from the drop-down menu.
Select Transparent Text from the drop-down menu
This will create a watermark with transparent areas.
Step 4: Set the Transparency of the Watermark
Now we want to set the transparency of our watermark. Select the watermark and then go to Window > Transparency or just press Ctrl+Shift+T (Command+Shift+T on a Mac).
In the Transparency window, set the Opacity to 100%. This will make the watermark completely transparent and allow it to blend in with your document.
Step 5: Add the Watermark to Your Page
Now we want to add the watermark to our page. Select the rectangle and then go to File > Place. Locate and select the watermark you created in Step 3, and then click on OK.
The watermark will be added to your page. Now, when you view your document or exported file, it looks like a regular normal page.
However, there is an invisible rectangle that has been placed in the center of the page. This is where the user will click before flipping pages in this virtual magazine.
Adding Interactive Features Like Hotspots to PDF that Trigger Video Clips When Clicked by the User
Interactive features are all the rage these days. Whether it is a website or an app, people want to be able to click on something and have some sort of reaction happen. And this isn't limited solely to technology either.
People also want interactive content in print too! We will talk about adding hotspots to PDFs that trigger video clips for educational purposes.

Hotspot links can be added anywhere on the page by selecting “Add Link” from the menu bar at the top of the Adobe Acrobat Pro DC software window.
From there, simply place your cursor where you would like it to go and choose “Create Hotspot.” The hotspot link automatically creates a small box that can then be edited with text or other graphics.
Adding Hyperlinks within the PDF Document that Link to External Websites
If you are in the business of writing, editing, or publishing PDF documents that may contain links to external websites then this blog post is for you. You can add hyperlinks within your PDF document that will link to an external website.
This allows for seamless navigation between pages and websites without having to open up a new tab on your internet browser. The process takes just a few minutes.
Finalizing Your PDF Flipbook with Different Export Settings – Exporting as HTML
An important step in the creation of your PDF flipbook is determining which export settings you want to use. If you are looking for a more interactive experience, then HTML might be the way to go. HTML allows you to include hyperlinks that link directly to other pages or online resources.
You can also include video and audio files, as well as custom fonts and colors. An even better format or setting might be ‘ePub' (electronic publication) which gives you an advantage if you plan on printing your book because it works with print-specific settings like CMYK color mode.
Conclusion
If you have an old PDF document that has a lot of information on it, but the recipient doesn’t want to read through all of it, try converting your PDF into a flipbook.
For this, you can use Flipbuilder software for free, which contains all you need to turn your PDF documents into ebooks with media-rich interactive pages that can be flipped like a book.
This will make flipping through pages in PDF much easier and give people access to the content in their own way without having to scroll or zoom out too far from the page.

